Remove your old grips, install the sticky backed heat elements, secure them with a few rings of 1" heat shrink tubing. On the left grip, you may want to put a layer or two of tubing under the heat element to balance out the feel since it is inherently cooler than the throttle side. Route the wiring, leaving enough slack on the throttle side as needed.
To keep from accidentally killing your battery when you leave your grips on (and you will forget), you'll want to power the grips via relay and distribution block. I used a 5 pole relay, wired as shown.
The 87 pole will route power to the block when the relay is energized, 87A will have power when the relay is powered down. For my installation I used 87A and a ground feed to connect to my SAE charging wire. That way I save on wiring mess, connections to my battery and the charging port is "dead" when the bike is running. Pole 86 is fed from the taillight wire. Pole 30 will need a fuse between the relay and the battery. My drawing of the power block is not really accurate as the terminals are separated horizontally, instead of vertically as I drew it. But you get the idea. For future expansion of farkles, I went with two separate blocks. Many moons ago, a friend had a low speed get off. Thankfully he was ok but his bike started acting strange. Honking, lights flashing, loss of power, then back to normal. We eventually got it into the garage and it turned out to be a loose ground due to all the goods stacked on it. So, moral of the story, use distribution blocks.
This aluminum sheet will be replaced with ABS, molded to fit.
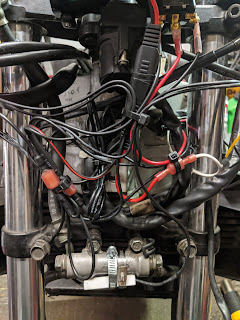
Both blocks nestled in their new homes.
Wrapped up with quality electrical tape to add a level of weather proofing.
Lookin' good!
Definitely don't bundle it with wires unless you want to release the magic smoke from your harness.
My wiring is a bit messy as I'm also powering a USB power outlet on the backside of my dash plate.
Update:
New ABS inner "fender" in place and distribution blocks attached with velcro strips.


No comments:
Post a Comment