Showing posts with label XJ. Show all posts

5.09.2016

Gear Review: LS2 Pioneer Review

LS2 Pioneer Review

**UPDATE**
Click here for the post covering the SENA SMH5 installation.

I've been lusting after a dual sport helmet ever since I saw the Simpson GS-3 MX.  I loved the styling, the large field of view and the air flow.  However, I didn't buy one due to terrible reviews. When I got my Ulysses, I started shopping for a dual sport lid again.  Unfortunately, I wasn't able to find one that offered multiple shell sizes, fit for a long oval head and priced under $300.  When LS2 offered me a chance to review their new dual sport helmet, I was ecstatic to learn that not only did it meet the above requirements, it is also DOT / ECE rated and has a whole laundry list of other great features.

First, a little background on the fastest growing helmet company you've probably never heard of.  LS2 has been manufacturing helmets for several large companies for 8 years.  They are the #1 selling helmet company in Spain (their home country), #2 in Italy and #3 in France.  In addition to having a Moto GP Team, they have been worn by winners of the Dakar (3 quad riders and 2 motorcycle).  Their moto is "Best product for the price and the best price for the product.", and if the rest of their products are like the Pioneer, they are sticking to that motto.

LS2 is factory owned, with production done in a factory north of Hong Kong.  The location features a full test lab covering all the major certifications: DOT, SNELL, ECE plus Japanese and Australian certs.  After a helmet is created, samples are sent to Southwest Research for independent testing and verification, the results of those tests can be found on the LS2 website.


Let's get down to the meat and potatoes of the Pioneer!

Shell

Made from a proprietary blend, called KPA (Kinetic Polymer Alloy) it keeps the helmet light but delivers low penetration rate and allows the shell to flex in order to assist with energy absorption. The Pioneer is produced in three shell sizes.  As I mentioned in my review of the Icon Airmada, finding a helmet that offers multiple shell sizes is a priority of mine.  The less weight on your neck, the safer you are.


The Pioneer comes in two color schemes, Solid and Trigger. I was torn between the Hi Viz Trigger and Matte Black.  Black, especially matte black, being the fastest color, won.

The peak blocks a great amount of sunlight and has minimal drag, even at highway speeds on my naked bike. The drag is decreased by having large cut-outs on the peak. It is removable but I think the benefits far outweigh a little drag.  You can adjust its placement up and down by about 5mm each direction.  If you push it all the way down (forward?) it does contact the visor when it is raised.


There are 5 vents built into the shell: 1x chin vent (close-able), 2x top vents and 2x side vents.  They flow a massive amount of air and funnel it out via 2x exhaust ports on the backside.


Visor(s)

The visor gives you a huge field of vision and is UV, fog and scratch resistant.  Most of my commutes have been in temps ranging from 40 to 80 degrees, thanks to all the airflow, fog has not been a problem.  When shopping for dual sport helmets in the past, the visors all seemed to have some distortion due to the curve of the shield.  The Pioneer is distortion free and seems to be 100% optically correct.   It's easy to clean and the removal process, while not as fast as most street helmets, is simple.  Unscrew the side screws, remove the peak and visor. Assembly is the reverse.


The Pioneer features a drop down internal tinted visor that is operated via slider on the left side of the helmet.  Some helmets use a clunky linkage or spring system to operate their visors, the Pioneer uses a cable.  Due to the peak blocking a good amount of sunlight, I haven't really needed to use the internal shield very often.  When I have used it, it has worked well and is easy to operate.


I tested a set of goggles and they fit perfectly.  The goggles fit properly within the eyeport of the helmet, the visor closes over the strap without issue.  The strap sits securely between the exhaust port and a raised section above the DOT tag.  


Internals

The Pioneer uses  a multi-density EPS that is channeled to help air flow.  The liner is hypoallergenic, removable, washable, breathable and does a good job at wicking away sweat.  The liner features a recessed portion for glasses.  I wear "vintage" style glasses with thick arms and they fit well without being pressed into my head.


The cheek pads are laser cut from a solid piece of foam and feel much nicer than the standard pieced together cheek pads in most helmets.  Another feature of the cheek pads is the quick removal loops on the bottom.  If you are ever in a crash, EMS workers can pull straight down/out to remove the pads and then remove your helmet with a greatly lower chance of compromising your c-spine. This really should be an industry standard in all helmets.  I spent a brief time as an EMT and removing a helmet from an injured person is no easy task.


Instead of the standard D-ring buckle system, the Pioneer uses a ratcheting buckle system with a quick release tab.  It is DOT approved and a time saver, especially if you need to adjust/remove your helmet while wearing your gloves.


Fit and Comfort

I wear an XS in every helmet I've ever owned. I prefer my helmets to be tight, on the verge of uncomfortable. The Pioneer seems to run a bit big.  Not unsafe but just a bit looser than I like.  This is easily solved by wearing a Buff or other type of balaclava which I do on about 90% of my rides anyway.  The internal shape is a long oval style and fits great with no hot spots or pressure points. The wind noise isn't bad, with ear plugs it's just a bit louder than my other full face helmets.  As I mentioned before, the peak does cause some drag at highway speed but it's not terrible, even without a fairing.  It's only really noticeable during head-checks but it's not enough to jerk your head back.

Quality

For a helmet that falls in the sub $150 price range, I was truly amazed at the overall build quality and features that are packed into this lid.  The vents all work well, the chin vent opens and closes smoothly. The visor latches closed securely, there no mid position notches, it's held in place by friction.  I've found no issues or "quirks".  Using black EPS would be a good touch (maybe there is a reason why it's white?).  Overall, the quality is outstanding.  


Final Thoughts

My ICON Airmada was my go-to helmet but I've been grabbing the Pioneer instead. It delivered features and quality far above my expectations, especially for the price.  Besides the slightly loose fit, I have found no negative points to this helmet.


3.02.2016

Cheaper to Keep Her

Over the winter months, I get some serious bike lust.

My eyes start to wander to Craigslist or ADVrider and soon I'm day-dreaming about another Ulysses, a naked DL650 Strom or maybe even something small and stupid fun like a TW200.  Then reality sets in and I remember I'm currently self limiting to one bike right now.  Even though I sold the XJ once before, I don't think I could do it again willingly (if it was a financial emergency, sure).  Plus, after a certain point, you won't be able to get back what you put into a bike.  I don't have much money thrown at the XJ but I have time and a bit of my soul wrapped up in there.  It was my first real bike that wasn't a complete POS and it was the first bike that my wife and I rode together on.  Nostalgia can be priceless.

Loaded up for a 5 day trip, last October. 

Loving an old, almost outdated when it was new, bike can be a bit disheartening at times, especially if there isn't a good amount of aftermarket or support for that model.  The XJ600 SECA II (Diversion outside the USA) is like that.  Thankfully, XJRider.com is a wealth of knowledge and support.  When a bike like this starts to get long in the tooth, we have to begin scavenging parts off of compatible bikes, like the FZ6R.  Since the tail of my XJ is getting a bit squishy and low, it's time to bring in a donor part.  En-route from eBay is a 2010 FZ6R rear shock which should a great improvement over the stocker.

     It's a simple swap w/the stock unit, no mods or spacers required.


Once the rear suspension is remedied, it will be time to look at the front fork.  The ride is a bit too harsh for my taste.  This didn't really come to light until my trip last October when I went on a very spirited ride on some crazy back roads.  One particular section almost had whoops like a motocross track.  The front fork was pogo-ing pretty bad and that made me feel really uneasy; and feeling uneasy about how your bike handles is a recipe for disaster on a tight and technical road.  

When my wife used to ride with me, I replaced the fork seals and fluid (moving to 15w).  Now that I ride solo, I need to move back down to stock weight.  I've looked into fork swaps but that will require a lot of additional parts (wheel, brake calipers and etc) and will have to be handled at a later date along with a rear wheel swap (move away from the legacy tire size).  These mods will definitely push my invested amount past what the bike could realistically sell for. That's ok, because there is something to be said about creating what you want out of something and in turn, knowing everything about it.  

When I start to day-dream about a newer bike, I think about how little I paid for my XJ and how much enjoyment it's given me.  The insurance is down to $75 a year,  with good coverage amounts and it still gets 40 mpg (if don't get too throttle happy).  It might not have fuel injection, high end components or the exact engine characteristics that I prefer but she's a good bike that will take me where ever I want.  In the end, it is cheaper to keep her.  

8.10.2015

Going Naked: XJ600 Naked Conversion Stage 1

Over the weekend, my XJ went from this:

To this: 


The process was fairly simple since I'm using an old Garmin GPS as my speedometer and trip meter.  I'm not sure how well that will work out but it's better than nothing and my penny tech budget doesn't have room for new gauges.  I used 1.5" anti-vibration clamps on the forks, shimmed with some rubber drawer liner.  For the ears, I cut up an old street sign I had laying around.  The headlight is from a Suzuki GS.  

There is still a lot left to do.  Stage Two includes making a dash to house my power plug, heated grip switch and the warning LEDs (oil, signals and neutral).  Then it's on to making covers for the coils and horn.  I plan on cutting down the stock wind screen and making a little fly screen. 

I'm looking forward to riding it this week. (I have no choice, a CV Joint failed on my Element.). 


7.06.2015

Service: XJ600 SECA II Cam Chain Adjuster

The XJ's cam chain has been a bit noisy since I got it back.  It has an auto tensioner but sometimes they can get bound up.  So, following instructions from XJrider.com,  I made time this weekend to finally take care of it (and solve a minor oil leak).


Easy peasy, pull the tension bolt (12mm), remove it and then remove the mount (5mm allen). Plug the tensioner hole and scrape off all the old gasket.  Hopefully you have an easier time that I did.  It took some serious work to remove it all.  I used gasket remover and let it soak over night.  Finally I got it cleaned up.


Does anyone else write notes on their engines in Sharpie? I got into this habit on my old CL450. 


Bits n pieces.


Why pay $4 for a gasket plus $5 shipping when you can make your own? 


All plugged up! After assembly, rotate the engine forward (counter-clockwise) at least twice, slowly.  You should hear the tensioner click as it takes up the slack.  After that, I started the engine and enjoyed the lack of cam chain noise.  

6.04.2015

Contour ROAM durability test

My friend and future riding buddy (we've been resurrecting his G650GL) loaned me his Contour ROAM back in 2013. I used it on the Ulysses on an almost daily basis and got some great videos. I finally mounted it to the XJ over the weekend and yesterday I used it for the first time.  I was traveling from the north to the south side of Indianapolis to do some training when I hit the I65 exit, I noticed something was missing.  That something was the ROAM.   That meant, I had almost 14 miles of 3 lane highway to retrace and search.

After the training session, I rode back to the start of my trip and started looking.  I had the camera mounted in it's waterproof case to help keep it safe from flying road debris since it was mounted fairly low.  Riding down 465, everything on the side of the road looked like it.  Shiny and clear. "There it is! Oh, nope, another bottle. Wait, is that it? Damn." This happened over and over.  I was worried that I lost it while in a middle lane and it got run over or worse, it bounced and hit someone's windshield.


It's lost somewhere along the blue line.

Finally, I tell myself I'm not going to find it and then, what the hell? There it is laying on the stripe between the breakdown lane and the fast lane!  I quickly scan the breakdown lane, merge over and jam on the brakes! Kill the bike, put the side stand down and start the long walk back to find it.  By the time I stopped, it was probably 150 ft behind me.  Thankfully, I got to it before it got hit.  The waterproof case was ground down in places and the door was broken off.  However, the camera was intact! It survived an impact at roughly 65-70 mph and a slide from the middle lane.  Unfortunately, I don't have video of it hitting the ground and sliding through traffic, it stopped recording when it broke free of the mount*.


Way to go Contour, you make one hell of a product! Now, it's secured via camera lanyard looped around my helmet strap.


* Disclaimer:  I was not using the stock supplied double sided tape.  This failure was not the fault of Contour.  It was purely user error.  

5.11.2015

Adding a Pelican case to an XJ600 Part 3

The front top case mounts failed last week.  When I built them, they had to be tall enough to so I could still remove the seat but I was worried that they were too tall and the weight of my laptop bag would bend them.  However, I didn't think they would break at the bend so quickly.


The case barely made it home.  After stripping the mount and racks apart, I dug out the parts for my original plan.  Basic PVC spacers to go between the case and the bike.  Since I swapped my Corbin seat for a stock one, the case no longer needs to sit almost 3 inches off the bike.  Everything went together perfectly.  The case is very stable but I did add a friction fit rubber spacer at the tail of the bike to help support the case.


5.06.2015

Review: Cycle Gear Trackside CR HI Bend bars

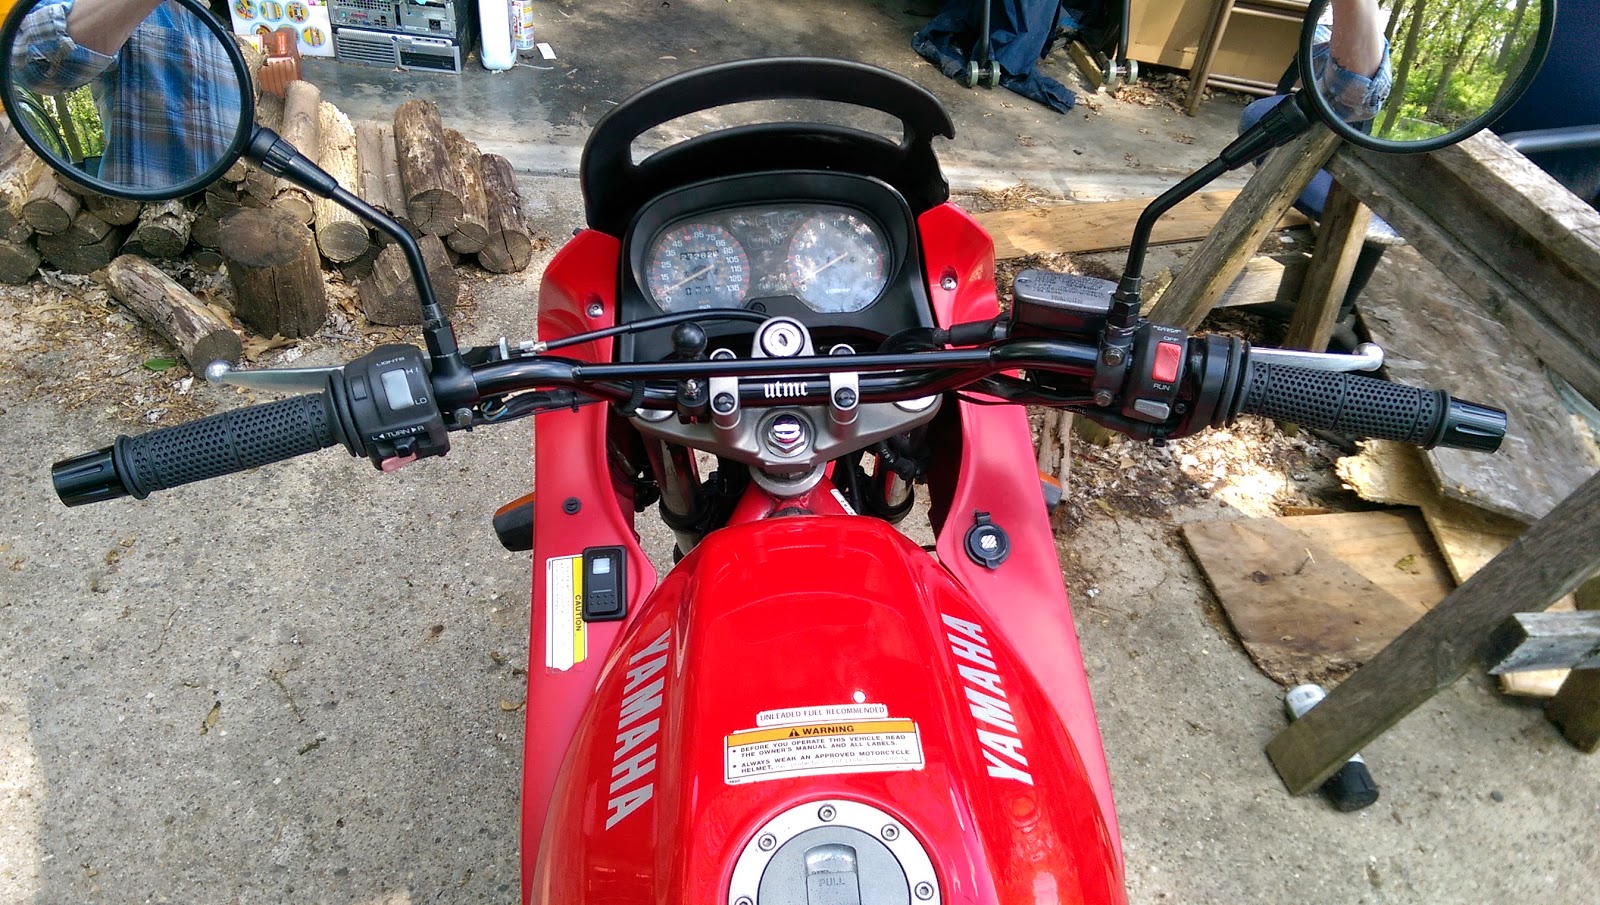
The stock handlebars on the XJ have always bothered me. At first, I thought it was the height, then I rode a few bikes with dirt bike / mx style bars and I knew that was the fix but finding the right bar was turned out to be trial and error.

I started off with a set of bars that came stock on my friends Yamaha that he uses for flat track.  They were good but too wide.


The 2nd Annual Indianapolis Mad Max Run was fast approaching and I needed a solution.  So I picked up a set of Trackside steel CR HI Bend bars from CycleGear. In the store, I waffled between these and a set of FLY ATV bars that were taller.  The Trackside bars installed just as easy as any others with the exception that the left grip area is scored to help the grip stay in place.  I'm running heated grips with heat shrink tubing under the left side for added insulation, so this wasn't a big deal. However, it did cause an issue sliding my mirror mount on.  These bars are about an inch and a half shorter but with more pullback or sweep.  


The riding position is much better than stock in my opinion.  I feel like I have better control over the bike, especially over rough terrain.  To cut down on the buzz, I added a set of SPEEDMETAL milled bar ends.  They aren't as heavy as the stock set but they definitely help.  

3.16.2015

Adding a Pelican case to an XJ600 Part 2

With my mounts machined and rounded off, it was time to button up this project.  The days are getting warmer (and dryer) and I'm long overdue for some ride time.


I needed to mount the case high enough so the seat could be removed.


All in all, it was all pretty easy.  The case will give me secure and weatherproof storage for commuting, make me more visible (hopefully) and it's a good place for stickers!  I plan on adding some black retro reflective tape around the box and some LED brake/running lights at some point.