10.29.2020

Project CBR600F: Who does Number 2 work for?

 After getting the swingarm and chain replaced, I couldn't resist the call of the road and the beautiful autumn day.  Regardless of the wet leaves, it's one of my favorite seasons for riding.  I gathered up my gear, pushed the bike into the drive way, turned the petcock to ON and waited for the bowls to fill.  Instead of a roaring inline four, I was given this:


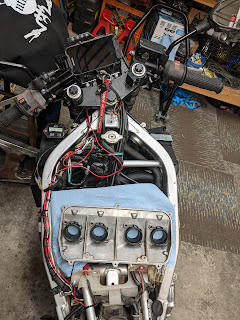
More fuggin leaks. Seriously?  After FULLY rebuilding the carbs, even the spendy Honda interconnecting o-rings.  It ran great, with no leaks back in May.  Unfortunately, I didn't put lines on the overflow tubes so I had no clue where the fuel was coming from and I didn't have any more fuel line. So, I pulled the tank, and put on the test tank.  The leak stopped.  WTH? Possible a stuck float, but I'm not counting it as fixed yet.  One thing I did notice was pipe #2 was not hot, hmmmm.  Along with a lack of fuel line, I also had no spare plugs to test.  Come to think of it, did I replace the plugs previously?  

Getting tired of seeing my bike like this...

Nope, I did not replace the plugs.  Now, I have a spare plug to use while checking spark (better than jamming a test light in there and jumping the ground). All 4 plugs have been swapped and the floats have been checked (again). I did add overflow tubes (with labels) so I can figure out which side is leaking without pulling the airbox. 

Should be able to squeeze in a leak test this weekend. If the leaks continue, I'll swap out the floats (and or float valves) from the donor set of carbs.  They were rebuilt many moons ago by my coworker who used to race a CBR600F in WERA.  The rubber is probably long gone but hard parts should still be viable.  While still frustrating, I'm still managing to find enjoyment in the work, which is a big change from the past. 

10.27.2020

Project CBR600F: Temp Check

I received my Trail Tech TTO surface mount temp sensor in the mail and decided to knock it out quickly before calling it a night. Installation couldn't be much easier (although it was messy). 

1. Cut the top coolant hose
2. Install the sending unit, tighten hose clamps
3. Stick/screw mount the unit
4. Set the time and your high temp alert
5. You're done!

With that installed, my gauge "cluster" is complete! I love the contrast between the agricultural tach and the high tech speed/nav application on the Android phone. 

10.19.2020

Project CBR600F: Swingin' Cycles

 One of the many previous owners of the Hurricane somehow managed to dent the left side of the swingarm, right along the tensioner slide.  To make matters worse, instead of fixing/replacing the swingarm, they cut the chain a few links short to compensate!  


I ordered a replacement from a junkyard earlier this year and installed some ring mounts on the crossmember above my garage to hang the bike from.  I used the same method on my XJ to replace the fork seals. While it's obviously not as stable as an actual bike stand but it gets the job done.  


The replacement process is simple, unbolt, remove, regrease, replace, torque to spec.  Easy peasy.  I went fancy with my chain and chose the gold plates, classy.  However, my chain didn't include the rivet style master link.  Which is ok because I don't have the rivet tool.  Thankfully, I did have a clip style master link in my parts bin.  Got the chain cut to length (55 plates x 2 = 110 links)


I did manage to get out on a test ride (after a mysterious fuel leak, probably a stuck float) and found out cylinder 2 isn't firing.  I'm going to start with new plugs in all cylinders, I don't recall changing them previously.  If that doesn't resolve it, time to check fuel and compression.  From the test ride, I did learn that I really don't like low clip-ons.  I found a set with 1" of rise, they'll be here this week; however I'll probably swap them out for actual bars. 


stay safe out there.... 

10.16.2020

Project CBR600F: Facial Reconstruction Part 1

The Hurricane came to me essentially faceless, wearing only a sub frame and busted gauge cluster.  With my Android Dash in place, I needed to come up with a lighting solution and weather protection.  I browsed Amazon for some aftermarket LED options, initially settling on a round 7" LED headlight, complete with fork mounts and bucket.  However, I picked a vintage Lockhart windscreen and decided it wouldn't look right with a round headlight.  


I bet you can feel the 80's vibe through your screen right now.

The windscreen normally attaches to the sub frame but that has been tossed to the scrap heap, so I'll be fabbing my own mounts.  Speaking of mounts, fork mounts, or "ears" as some call them, can set you back a healthy bit of dough.  During my XJ Naked Conversion, I made ears out of an old road sign.  It cost me about $10 total, including the hardware; so I decided to go that route again.  

The other reason for dumping the round headlight is that I've always loved the face of the Ulysses XB12X that I used to own.  So, I found a set of dual LED fog lights (spot / flood combo) and a pit bike super moto fender.  Time to get to work! 

My inspiration.


The forks are roughly 8" apart, so I want to keep the headlights spaced to avoid an "eyes too close together" look.  Adding in a 1/4" on each side for the ears and windshield mounts should put it right about perfect.  I'll need to source some sort of metal (preferably aluminium) spacer for the center. The lights will be mounted together with some lock nuts and all thread.  This should allow me some play to adjust the lights up and down as needed.  These things are incredibly bright for their size, hopefully they have a good life span. 


Finding an aluminum spacer proved to be difficult, so I tried a few different approaches using coupler nuts but eventually settled on just using the mount that came with the lights.  This allowed me to mount the super moto fender nice and high.  It's more for aesthetics but it will give some protection from tire spray. 


I'm getting a real cyborg Gonzo vibe (as in the Muppets). 

Next, it was time to start mocking up the fork ears.  First draft is ok but I failed to take into account the rubber edging I would be using on the base material.  I should be able to cut them both from a single sheet of aluminum mesh.  


Mk1 ready for drilling!


Fancy JDM fender washers! Going to use these for the ear and side panel mounts.


The fork ear design may get a second shape but it works for now.  

The first round of mock-ups is looking good.  Nothing is lined up or mounted properly but I'm liking it. 


Next up is fabbing the mounts for the windscreen and buttoning it all up.